Adding funds to a Flight Schedule Pro account is a very wise decision for most users to make because Leighnor Aircraft will provide account credits (e.g. “free money”) for specific fund amounts placed on account.
Be sure and read the Leighnor Aircraft Rental Agreement carefully on terms governing money placed on account. It’s a great deal when users are actively flying. The caution is there are significant penalties if users place money on account, don’t use that money, and months later request a refund.
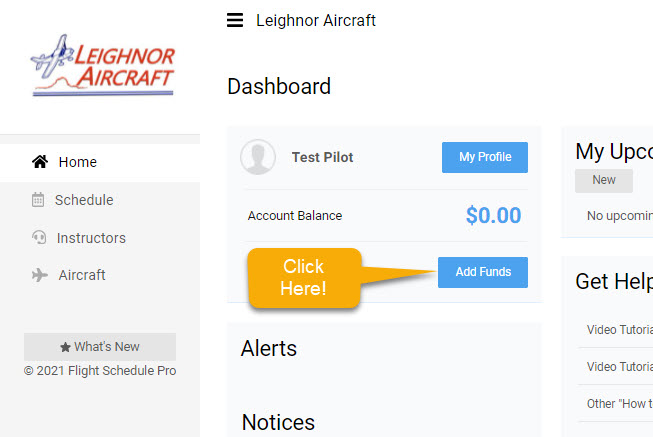
To add funds to a Flight Schedule Pro account, log in to Flight Schedule Pro, which will display the user Dashboard:
Add Funds button on user Dashboard
Click the blue “Add Funds” button and the following dialog will display:
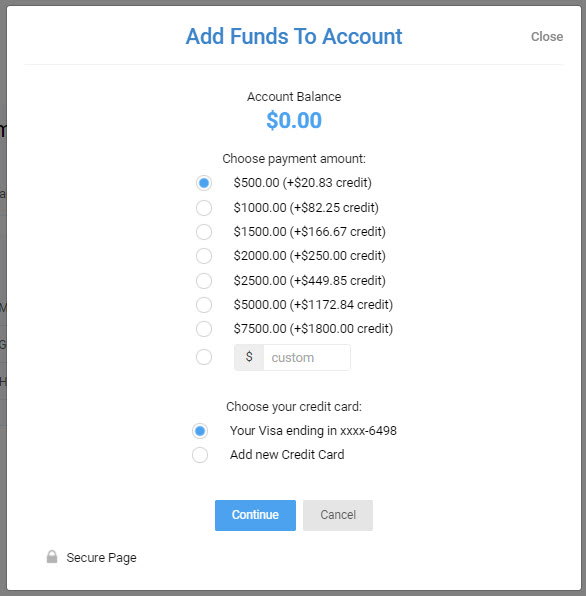
Add Funds dialog
As can be seen, a credit card has already been added to this account. There is an option to add another credit card, which will open the add credit card dialog fields and allow the user to save another credit card. By default the primary credit card will always be selected.
By default, the lowest pre-selected payment amount and primary credit card will be selected. If the blue “Continue” button is clicked, the confirm payment dialog will come up asking the user to confirm the payment.
In order to get the credits shown in parenthesis on the pre-selected amounts, the user MUST select that amount. If a custom amount is chosen, regardless of the amount, NO credits will be given. For example, suppose a user places $3,000 on account. The system isn’t smart enough to realize that’s a $2,500 credit amount and a $500 credit amount. If the user in this case truly desires $3,000 on account, do two add funds actions – one for $500 and one for $2,500. That way, the user would get the benefit of an additional $470.68 added to the user’s account balance.
Select the amount, the credit card and click the blue “Continue” button. The following payment confirmation dialog will display:
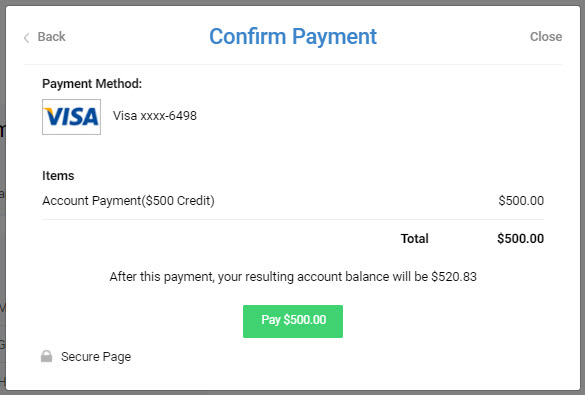
Confirm Payment
The “Confirm Payment” dialog will inform the user of the credit card being used, the amount being charged, and what the user’s resulting account balance will be once the transaction completes.
Clicking the green “Pay ….” button WILL attempt to charge the credit card. If the charge is successful, the user will be notified. If the charge fails for any reason, the reason will be displayed back to the user. Assuming the charge is successful, the users account will immediately reflect the new balance.